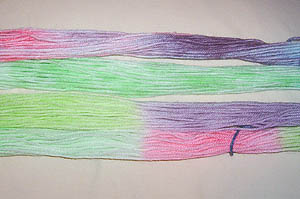
I tried handpainting with Kool-Aid following the techniques laid out in a number of instructional articles, but when I started my latest dye project, I couldn't seem to get even colors and consistent results on my first skein. The skein on top was done using a turkey baster to squirt the dye on, then gloved fingers to mush it through the whole section. The variation in color is really obvious in the purple section. The bottom skein was done with the dip-dye method, and has even color and neat transitions.
Here's how I did it.
Set-up
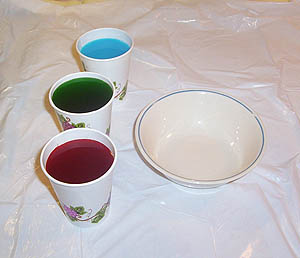
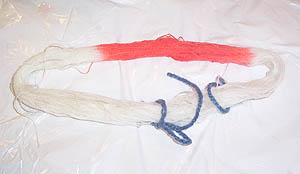
For the demonstration, I'm using three colors of Kool-Aid (cherry, lemon-lime, and ice blue raspberry lemonade, in case you want to be specific) and a small hank of laceweight wool. The bowl is for dripping--I'll get to that.
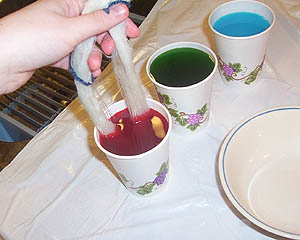
Start by dipping one end of the skein into whichever color you like. The section of that color on your skein will be twice as long as the depth you dip it. Pull the skein out of the dye and hold it over your dripping bowl, then gently squeeze out most of the excess dye. There's two reasons to do this--first, if you don't, when you refold the skein to dip a new section, you'll undoubtedly bleed some color where you don't want it. Second, if you're doing multiple skeins, squeezing out the dye back into the dyepot (or dye-cup, if you will) will eventually dilute the solution significantly, since most of the dye will remain in the fiber and the water that gets squeezed out will be much clearer.
Refold the skein to get a new "end" ready to dip. Dip into the next color, being careful not to overlap colors if you want a clear break, or overlapping slightly if you want the colors to mix over the transition.
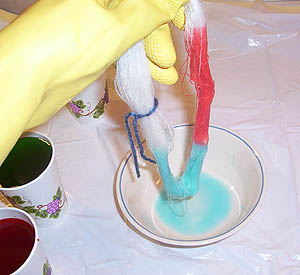
Here's my skein after two dips, held over the dripping bowl. I'd be squeezing the bottom of it, but then I wouldn't have a free hand to hold the camera.
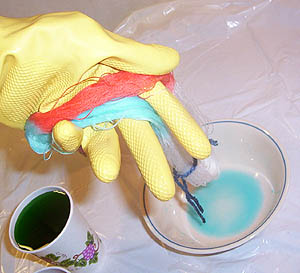
Refold and dip again as many times (with as many colors) as it takes to dye your whole skein. (If you're using more than two or three colors, a longer, skinnier skein would work more easily than a short, fat one like mine.) To help keep the two sides of the skein from touching (and thus colors from bleeding!) it helps to separate the two sides with your forefinger like so when you're getting ready to dip.
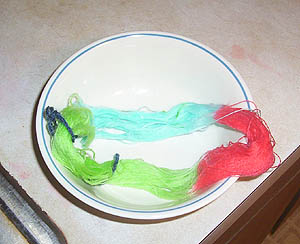
The finished skein. When you're all done dipping, set the dye as appropriate (I microwave my Kool-Aid-dyed skeins for two minutes then let them cool before a final rinse, but if you've got your own method that works, go to it.)
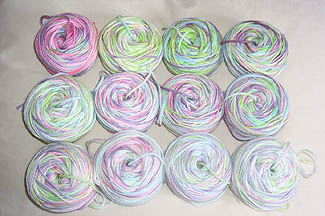
Didn't believe me about the dye getting diluted? Check out the twelve skeins I did for a cardigan, using the same colors throughout (though not the exact same set of colors on each skein, as you can see). The two on the right in the bottom row were the last two I did, and look how pastel they are compared to the four in the top row, which were the first I did. I didn't use a dripping bowl, because I didn't realize that would happen. But hey, dye and learn!